Trello Content Calendar
Creating the Perfect Trello Content Calendar: A Step-by-Step Guide
The Content Marketing Institute estimates that 88% of B2B companies incorporate content marketing in their overall marketing strategy, but only 32% have a written process for execution. The way most large companies effectively simplify the matter is by using content calendars.
A content calendar is a powerful method for planning out your content creation efforts and making sure your efforts align with your overall marketing strategies. To help you create your own content calendar, we’ve put together this extensive guide on how to use the popular project management app, Trello, to stay organized and manage content creation at your company.
We’ll cover how to use Trello to manage content creation, how to set up a calendar, and tips for improving your workflow. Let’s get started!
The Content Creation Process
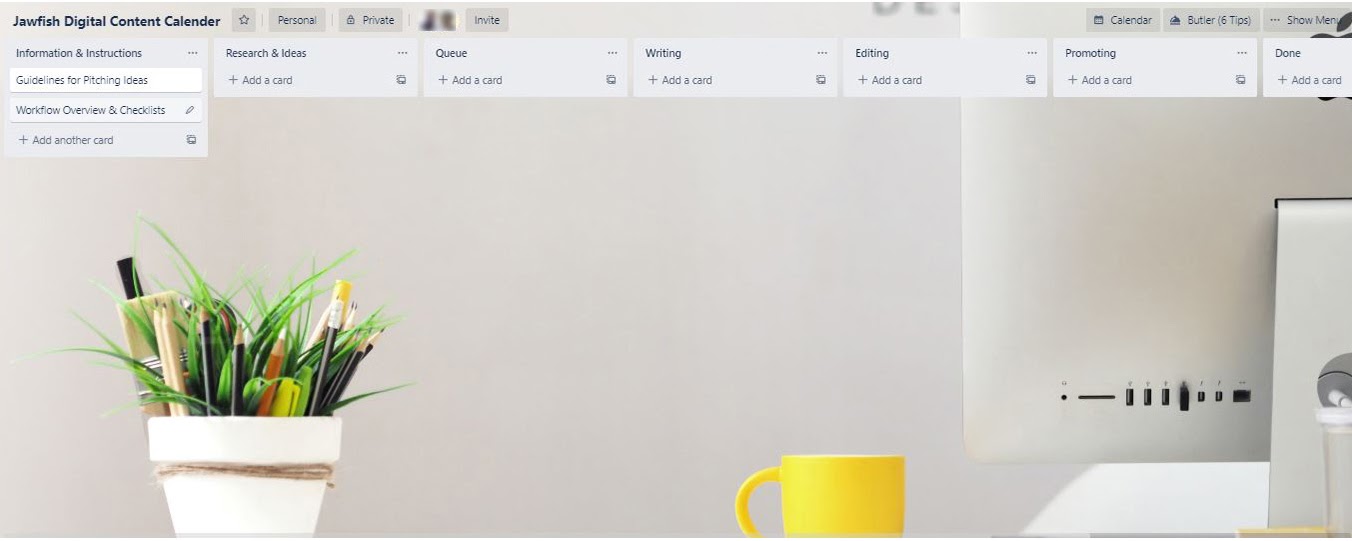
We’ll break down content creation into a 6 phase project. Each phase is added as a list on the Trello content calendar board.
The basic process phases are:
- Research & Ideas
- Queue
- Writing
- Editing
- Promoting
- Done
PHASE 1: RESEARCH & IDEAS
Phase one involves gathering ideas for a writing project. This phase is where you build the case for your idea, think of it as where you pitch the idea. Add your ideas here along with your research. Since this is also where you pitch your idea, write the reasons why the idea is great and useful for your audience.
Only add one idea per card so things don’t get too complex. Write your idea statement as the title of the card.
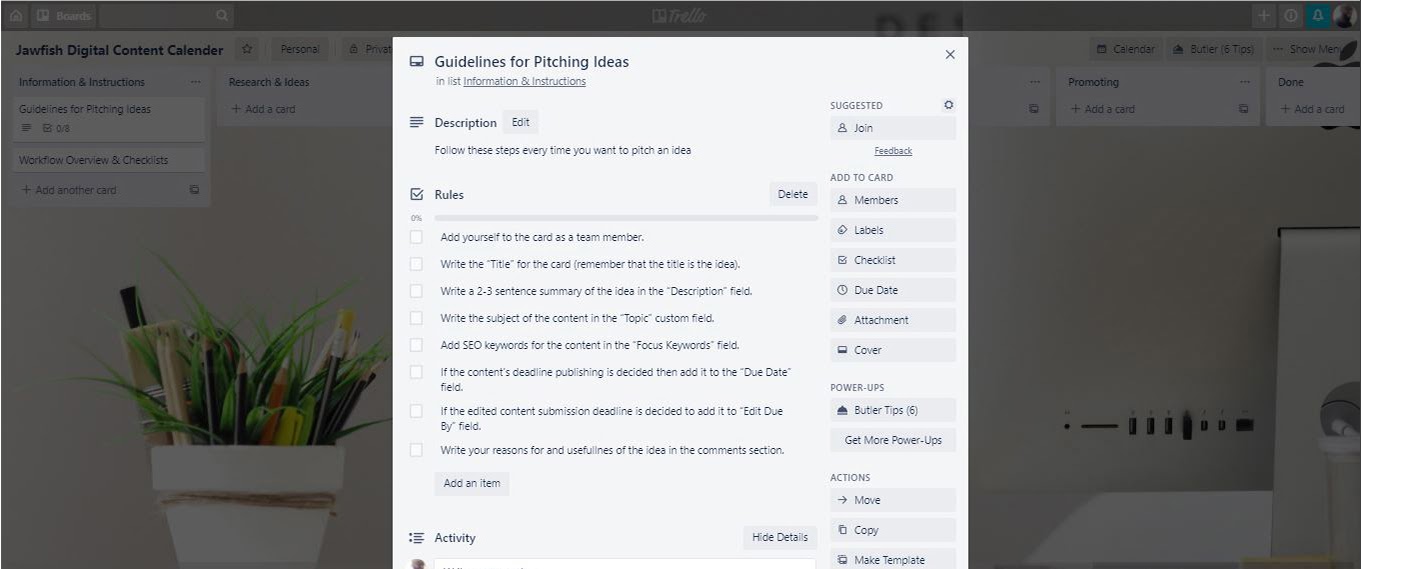
For each card in the Research & Ideas list, follow these steps:
- Add yourself to the card as a team member.
- Write the “Title” for the card (remember that the title is the idea).
- Write a 2-3 sentence summary of the idea in the “Description” field.
- Write the subject of the content in the “Topic” custom field.
- Add SEO keywords for the content in the “Focus Keywords” field.
- If the content’s deadline is decided then add it to the “Due Date” field.
Pro Tip: We’d recommend creating a templated card that already has these fields added, that you can then duplicate for each new idea that you have.
PHASE 2: QUEUE
Once your idea is approved, you can start phase two and move the card to the “Queue” list. The Queue is pretty much a backlog of posts to be written.
PHASE 3: WRITING
When you are ready to write, start phase three by moving an article (card) to the “Writing” list.
You should only put cards for ideas you are actively writing in this list. If you are personally writing the piece, keep editing at a minimum at this point. If you have a freelance writer working on the article, you can focus more on the next step when they turn back the finished draft.
PHASE 4: EDITING
To start the editing phase, move your card out of the Writing list and into the “Editing” list. When you are done with the editing phase you should have your final draft.
PHASE 5: PROMOTING
When you have a final draft you can move the card to the “Promoting” list to start the next phase.
At Jawfish Digital, we add a promotion phase to our workflow so we can make sure content is being properly promoted. It’s not enough to just post content and expect people to find it.
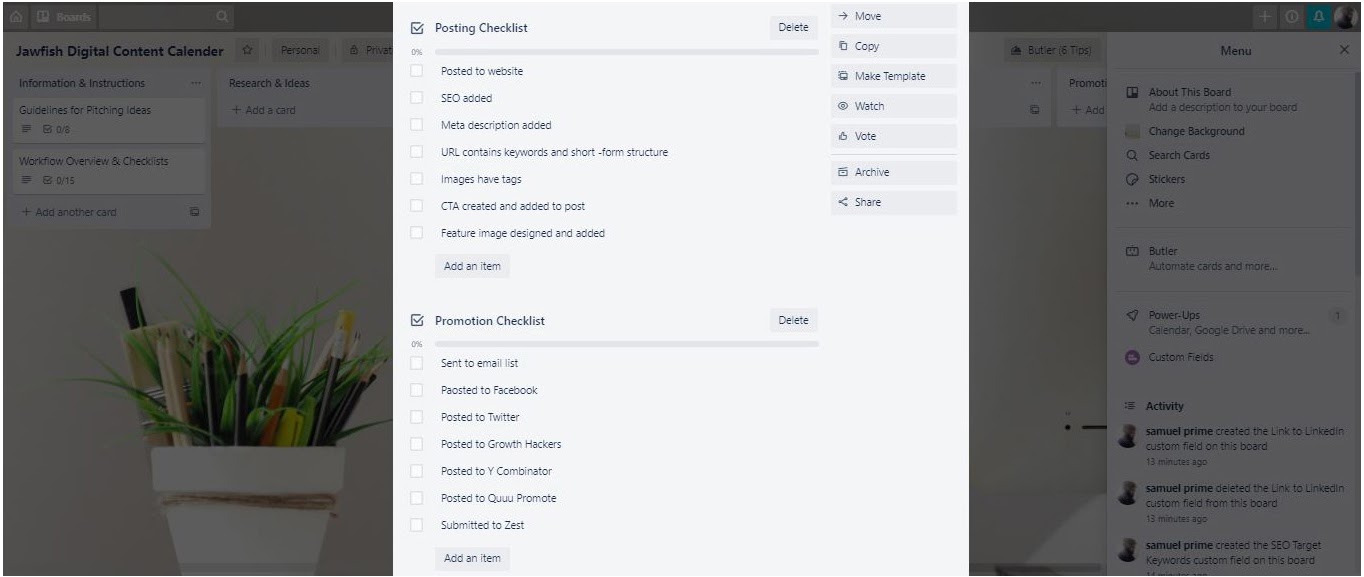
For each card, we have a promotion checklist, and when the card is added to the Promoting list, we work on completing those promotion tasks. Promotion tasks could include: sharing the published article to Facebook, sharing to LinkedIn, sending emails out to subscribers, and so on.
PHASE 6: DONE
Finally, once your card has moved through all phases and across all lists move it one more time into the Done list.

How to Set Up Trello to Work as a Content Calendar
OVERVIEW
- Create a new board
- Add the calendar powerup
- Add the custom label power-up (more than one power-up per board requires paid Trello subscription)
- Create a list for Information & Instruction
- Create lists for each phase (Research & Ideas, Queue, Writing, Editing, Promoting, and Done)
- Add permanent cards to Information & Instruction list
- Add a card named “Guidelines for pitching ideas”
- Add a card named “Overview of work phases”
- Add a card named “Checklists for each phase”
- Add details and checklist to permanent cards
- Add details and checklist to the “Guidelines for pitching ideas” card
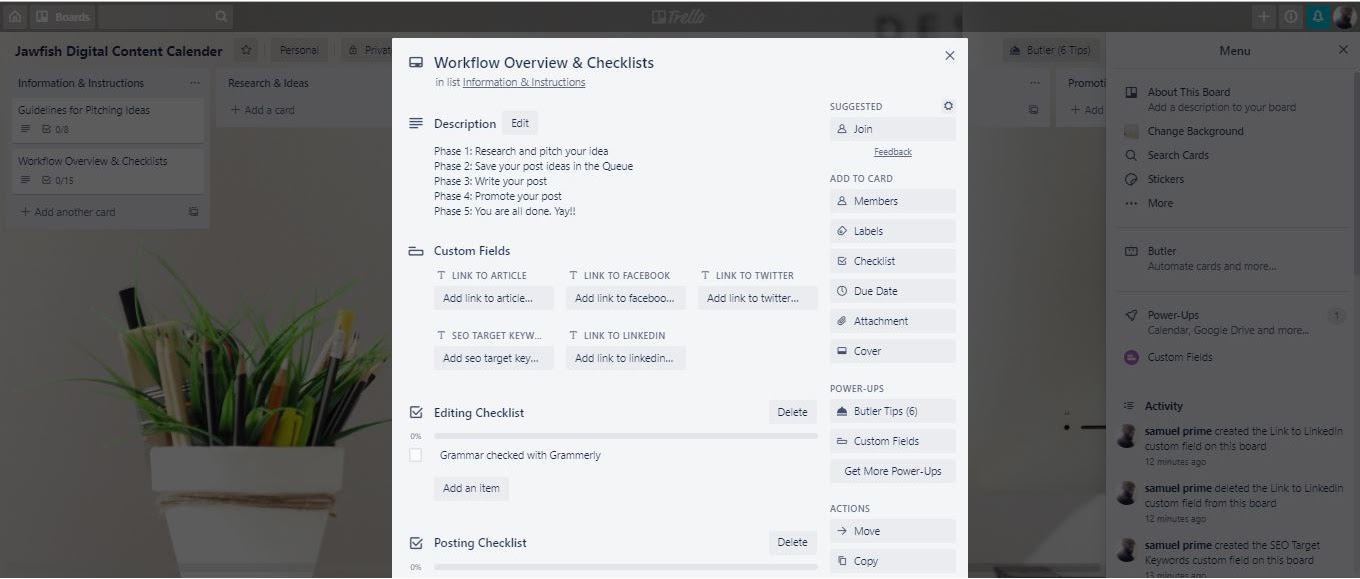
- Add details to the “Overview of work phases” card
- Add details and checklist to the “Checklists for each phase” card
SETUP STEPS
Step 1: Create a new board
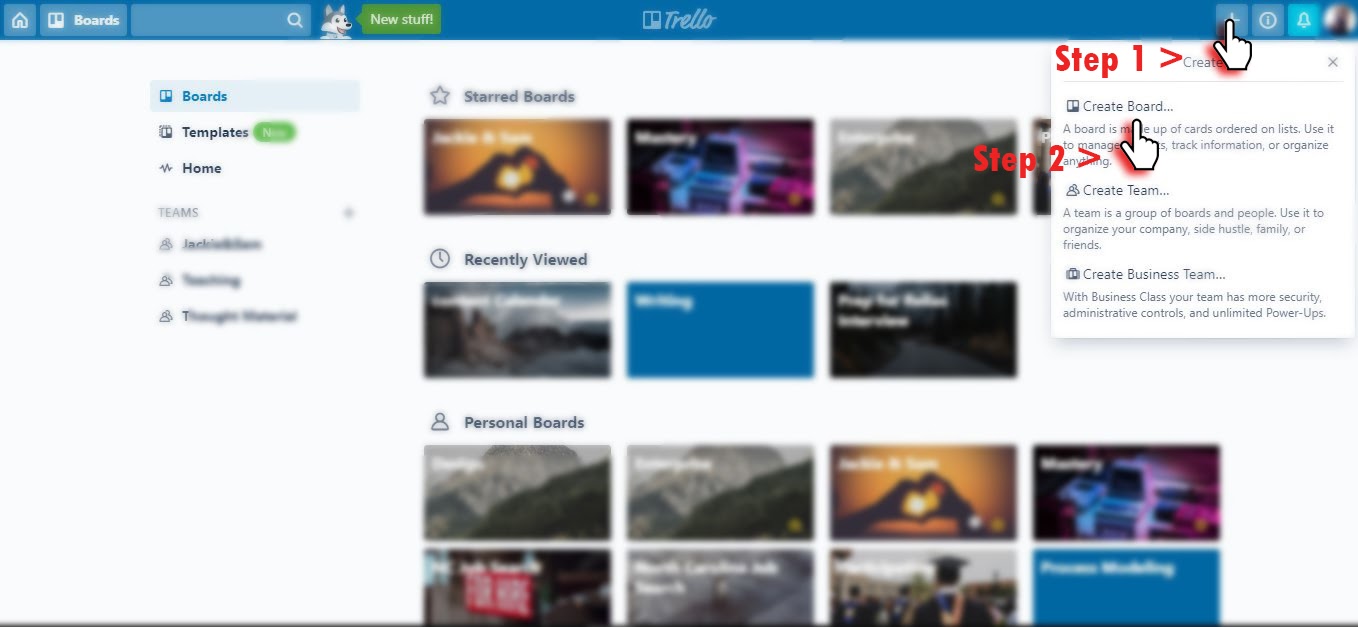
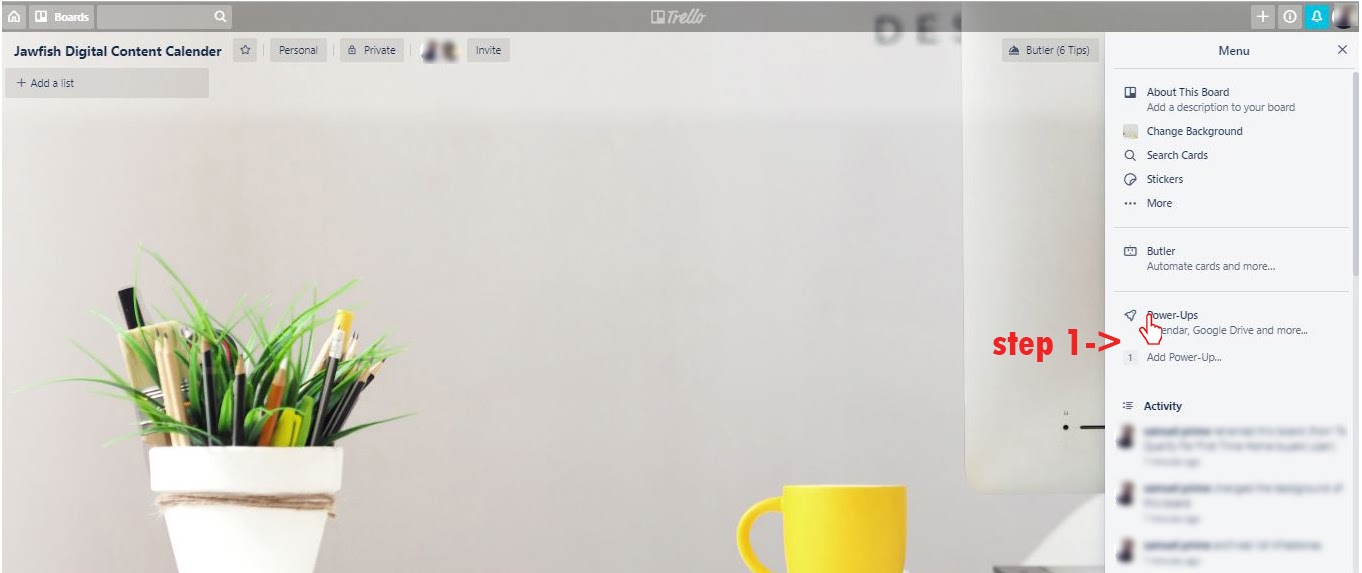
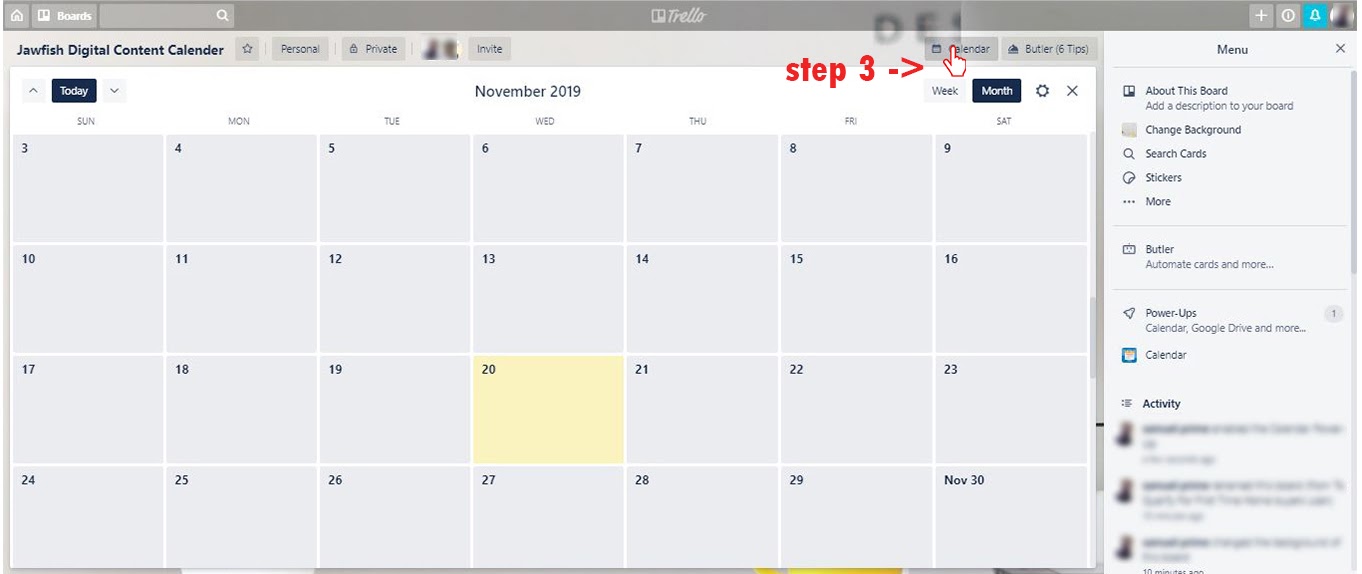
Step 2: Click “Power-Ups”, search for the calendar Power-up and click add once you’ve found it (if you click the calendar button in the top-right corner, your screen will switch into the calendar view).

Step 3: Add the “Custom label” power up the same way you added the “Calendar” power-up.
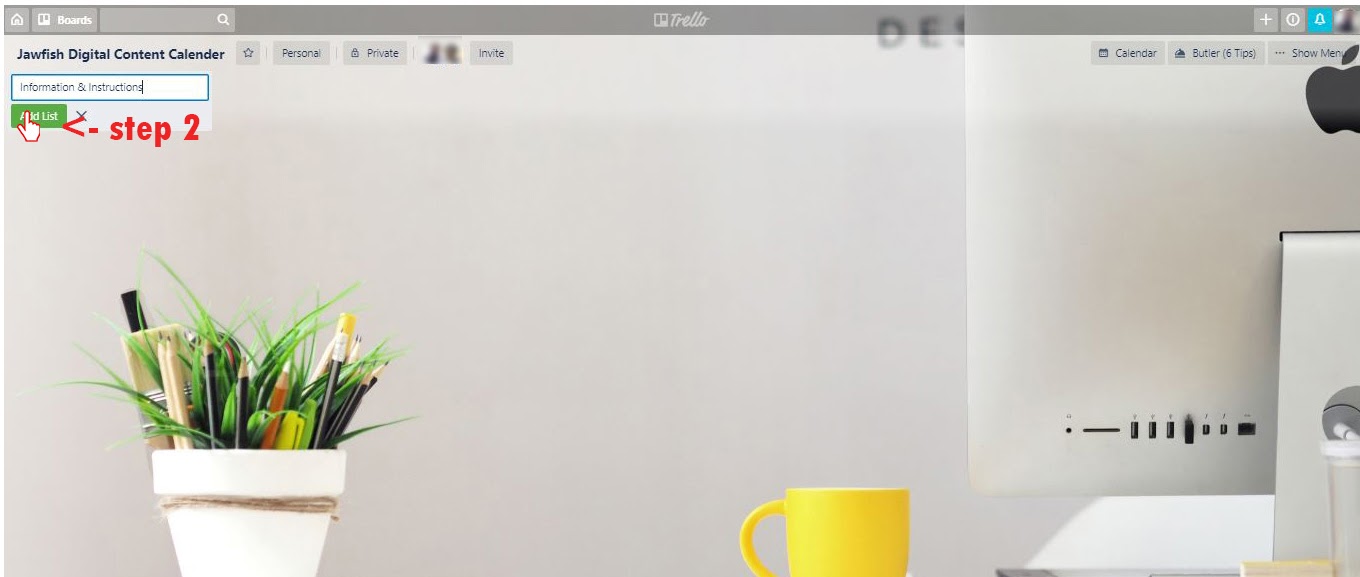
Step 4: Create the Information & Instructions list.
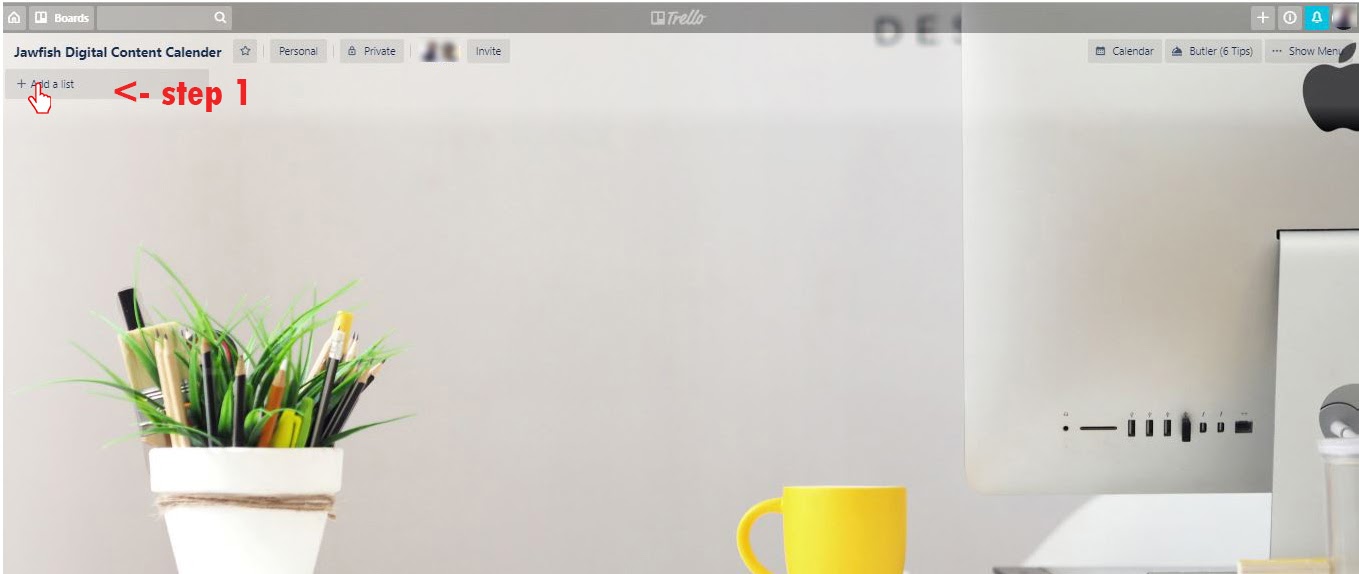
Step 5: Create a list for Research & Ideas, Queue, Writing, Editing, Promoting, Done, the same way as above.
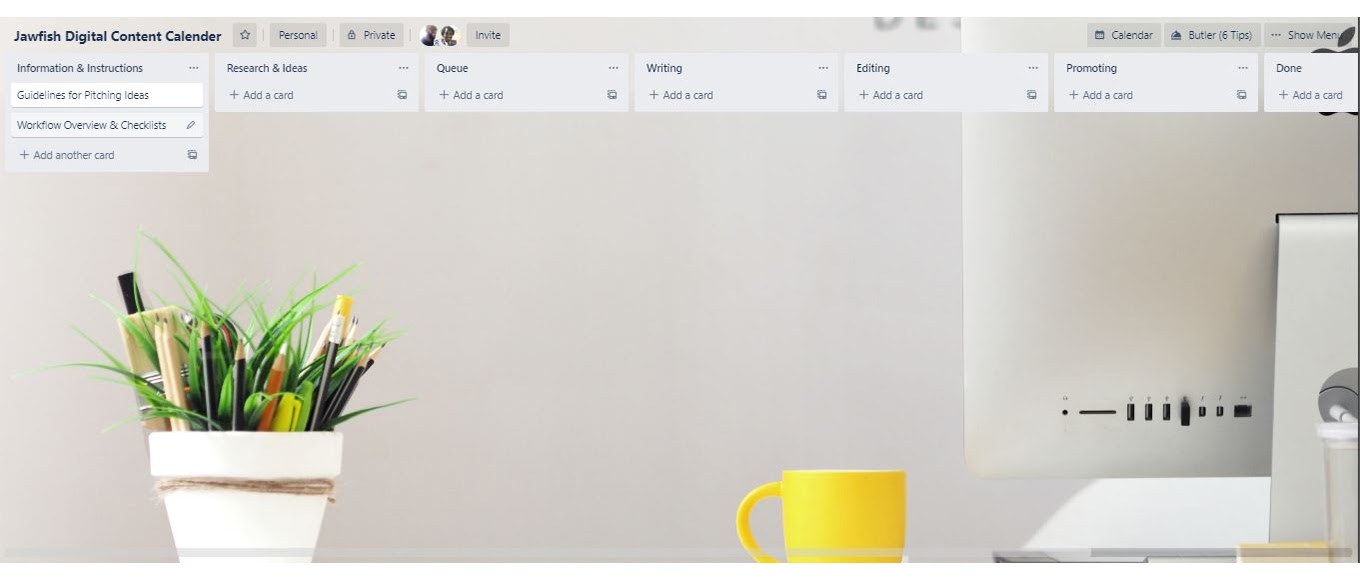
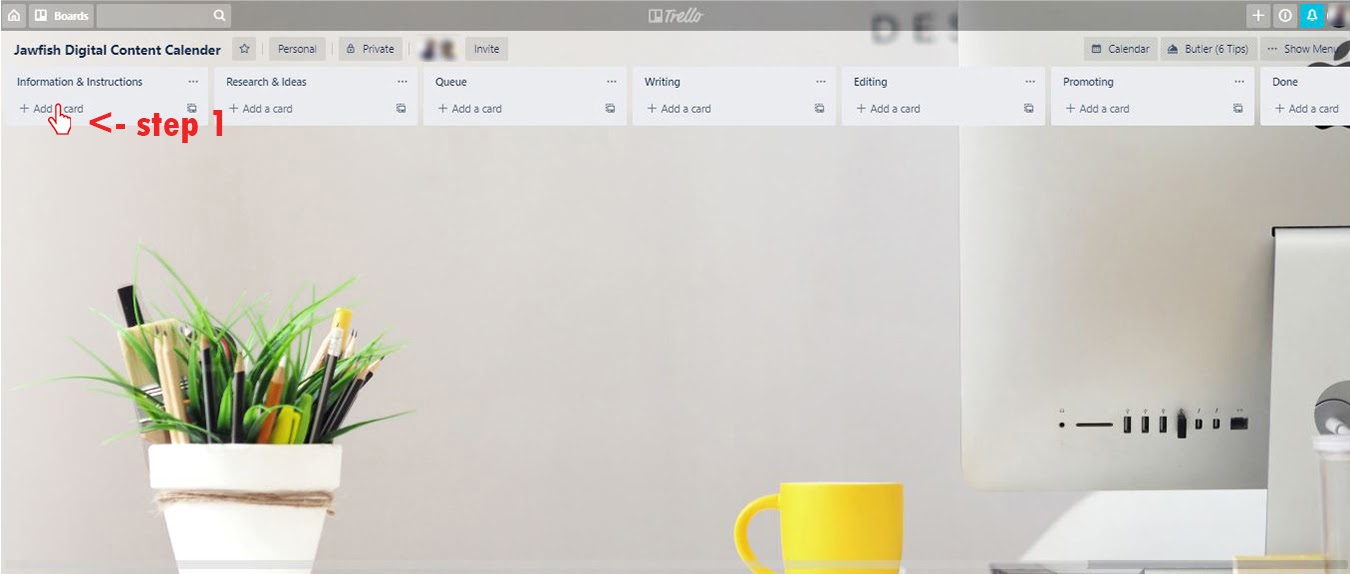
Step 6: Add permanent cards to Information & Instructions list.
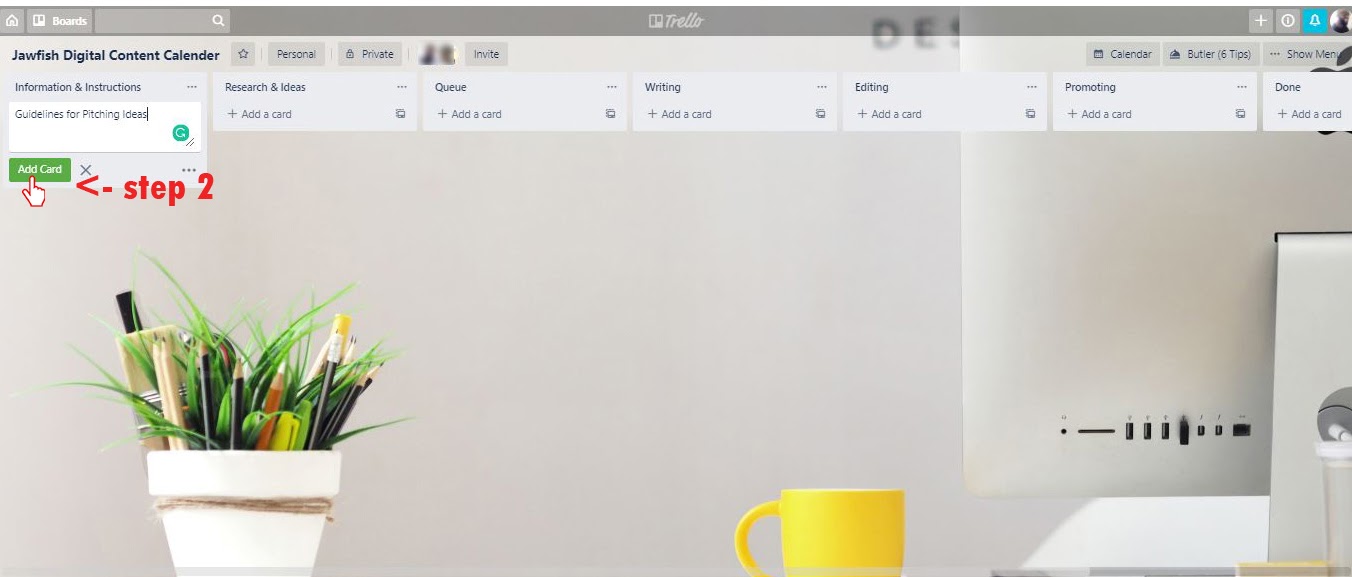
Then, add “Guidelines for Pitching Ideas” and “Checklists for each phase” cards.
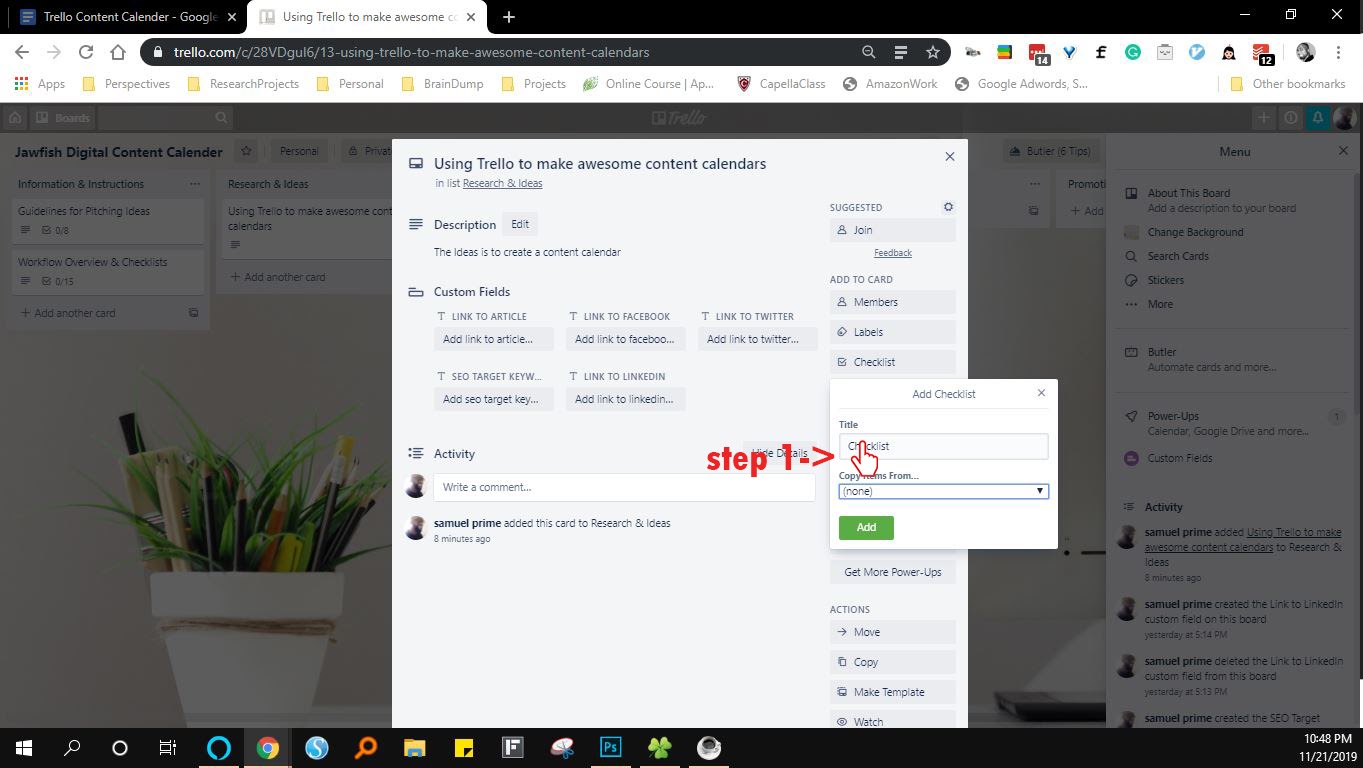
Step 7: Add details and checklist to the “Guidelines for pitching ideas” card.
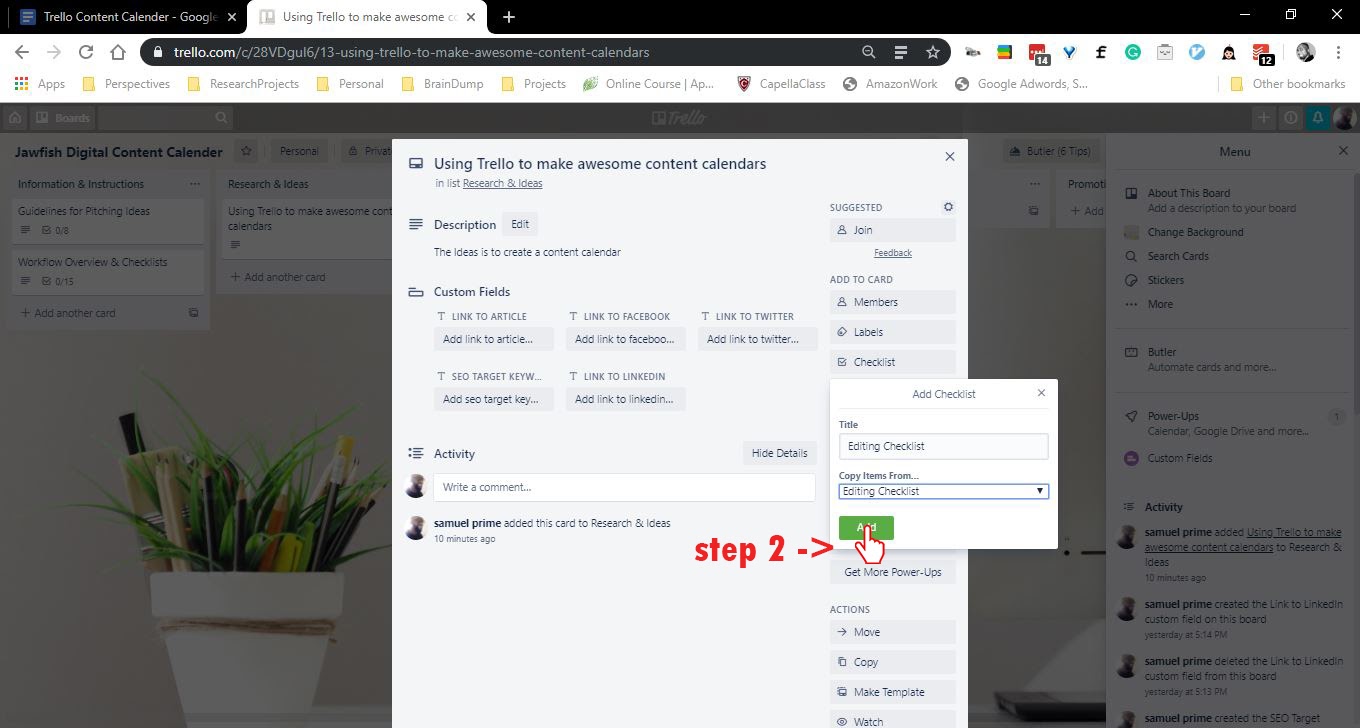
Then, add details and checklist to the “Checklists for each phase” card.
How to Bring it All Together
Once you understand the writing process and how to set up Trello, the lion’s share of your work is done. All you have to do now to make this system work is to move completed cards to the next list.
In addition, you must add checklists to each card for the tasks required for each phase (we’d recommend creating a templated card to use for future articles). When adding a checklist, copy the checklists from the Information + Guidelines card. When checking your calendar, click the calendar button on the taskbar.
Now you have everything you need to create a content calendar using Trello along with a powerful workflow to make it all work.
Some Useful Pro Tips to Consider when Using This Process:
- Use the Information & Instructions cards to create checklist templates so you don’t have to create a new checklist for each card.
- Use the “Due Date” custom labels on each card to set deadlines.
- Use the “Add Member” custom labels to add specific writers to cards.
- Use comments to document your communication with other members.
- Organize comments by tagging the members included in the conversation.
We know that creating and managing content takes a lot of work. If your company needs help just contact us here at Jawfish Digital and we can help you with all the heavy lifting.